C++ Setup Using Windows WSL (VS Code + WSL / Ubuntu)
Note: This guide was create in part with the help of chatGPT, OpenAI (1/7/2026).
Audience: CS104 Students
Goal: Build, debug, and memory-check C++ programs using a Windows-based Linux environment Platform: Windows Subsystem for Linux (WSL – Ubuntu)
1. Install Visual Studio Code (Windows)
If you do NOT have VS Code installed on your Windows laptop:
- Go to https://code.visualstudio.com
- Download VS Code for Windows
- Install with default options
Enable command-line launch:
- Open VS Code
- Press Ctrl + Shift + P
- Run:
Shell Command: Install 'code' command in PATH
2. Install WSL (Ubuntu Linux) and Configure Toolchain
2a. Install WSL
Open PowerShell as Administrator and run:
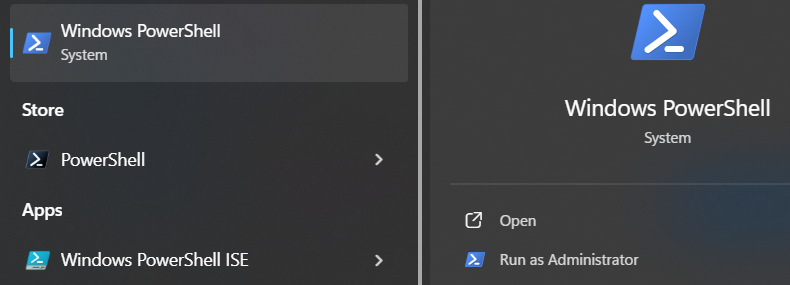
At the prompt, run:
wsl --install
This will:
- Enable WSL
- Install Ubuntu
- Prompt you to reboot (potentially)
2b. Set Up Ubuntu (First Launch)
After reboot, go to the Start Menu and:
- Open Ubuntu (from the Start Menu)
- Choose a Linux username and password
- We strongly recommend you use the same username as your USC username (i.e. if your @usc.edu email is
ttrojan@usc.edu, then we recommend making your WSL usernamettrojan).
- We strongly recommend you use the same username as your USC username (i.e. if your @usc.edu email is
2c. Update Linux Packages
In the Ubuntu terminal:
sudo apt update
sudo apt upgrade -y
2d. Install C++ Development Tools
sudo apt install -y \
  build-essential \
  gdb \
  cmake \
  valgrind \
  unzip \
  libgtest-dev \

cd /usr/src/gtest
sudo cmake .
sudo make
sudo cp lib/*.a /usr/lib
cd ~

python3 -m pip install xmltodict
3. Verify Installation and Setup WSL Extension
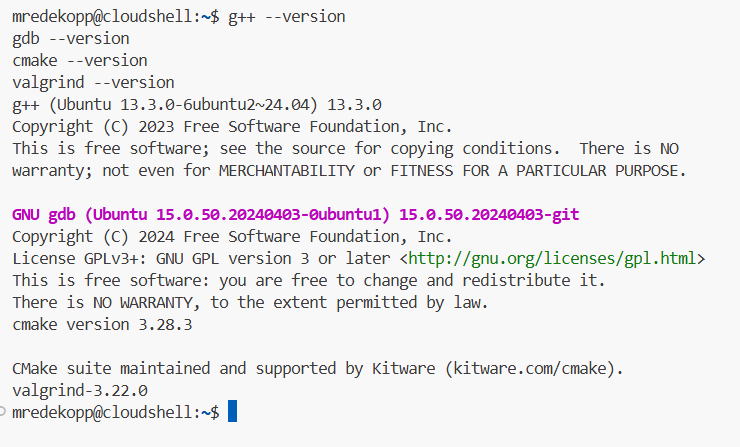
3a. Verify Installed Tools
g++ --version
gdb --version
cmake --version
valgrind --version
3b. Install VS Code WSL Extension
In VS Code (Windows):
- Open Extensions
- Install WSL (Microsoft)
3c. Open Your Project in WSL
From Ubuntu:
code .
4. CMake Starter Project (Multi-file, In-Source Build)
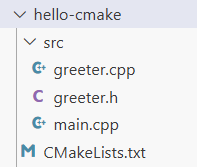
Here is the final folder structure and files you will now create:
Folder Structure
cs104-repos/
└──hello-cmake/
   ├── CMakeLists.txt
   ├── .vscode/
   │   └── launch.json
   └── src/
      ├── main.cpp
      ├── greeter.cpp
      └── greeter.h
We recommend making a cs104 or cs104-repos (you can name it what you like, but avoid spaces in the name) folder under your HOME folder.
To do so, use these commands at the prompt.
cd $HOME
mkdir cs104-repos
cd cs104-repos
Important Note: *Each time you want to clone a new repo or work on your coding homeworks or labs, you can navigate to the appropriate repo folder by starting a terminal and using the command
cd ~/cs104-repos/<repo_name>.
Now you’ll create the folders needed for the test example, hello-cmake. Enter the commands:
Create the test folders:
mkdir -p hello-cmake/src hello-cmake/.vscode
cd hello-cmake
Create the necessary files in the specified folders. Ensure you click on the appropriate folder before creating a new file in VSCode. The button to create a new file looks like:

CMakeLists.txt
cmake_minimum_required(VERSION 3.16)
project(hello LANGUAGES CXX)

set(CMAKE_CXX_STANDARD 17)
set(CMAKE_CXX_STANDARD_REQUIRED ON)

add_executable(hello
    src/main.cpp
    src/greeter.cpp
)
src/greeter.h
#pragma once
#include <string>

std::string make_greeting(const std::string& name);
src/greeter.cpp
#include "greeter.h"
using namespace std;

string make_greeting(const string& name) {
    return "Hello, " + name + " from CMake + WSL!";
}
src/main.cpp
#include <iostream>
#include <string>
#include "greeter.h"
using namespace std;

int main(int argc, char* argv[]) {
    if (argc < 2) {
        cout << "Usage: " << argv[0] << " <name>" << endl;
        return 1;
    }

    string name = argv[1];
    cout << make_greeting(name) << endl;
    return 0;
}
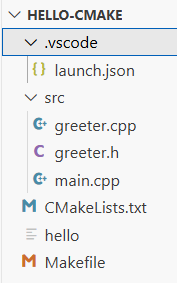
After creating these files you folder structure should look like this:
5. Build and Run (In-Source)
At the terminal in the lower pane (you may need to click View..Terminal)
cmake .
make
./hello Alice
You should see the program run and greet Alice!
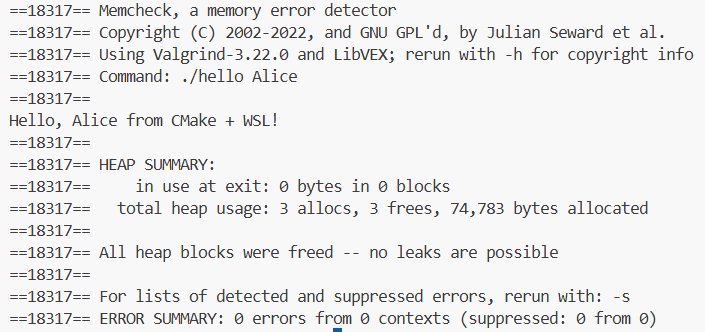
6. Valgrind (Memory Checking)
Now run with valgrind. You should see the same output as before but with the additional Valgrind banner and debug output.
valgrind --tool=memcheck ./hello Alice
7. Debugging with Cloud Editor (VS Code GUI)
To use the integrated debugging GUI front end of VSCode is most easily accomplished with a launch.json file in a .vscode subfolder. For VSCode to automatically find and use this configuration file, you must point VSCode to the top-level project folder where the .vscode subfolder resides. Regardless of where your terminal indicates it is, VSCode must be opened to the specific project folder.
So, choose File..Open Folder and choose the hello-cmake folder your created and click OK.
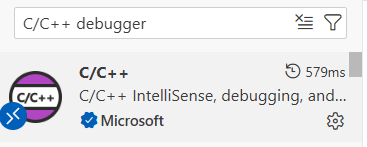
- Open the Extensions view (Ctrl+Shift+X)
- Search for “C/C++ Debugger”
- Install the extension authored by Microsoft (or any C/C++ GDB extension available in the marketplace)
- Reload the editor when prompted
Create .vscode/launch.json by first running these commands at the terminal (assuming your are in your hello-cmake folder at the terminal):
touch .vscode/launch.json
Your file tree should now look like:
Then open the launch.json in the editor and paste in these contents and save the file.
{
  "version": "0.2.0",
  "configurations": [
    {
      "name": "Debug hello (gdb)",
      "type": "cppdbg",
      "request": "launch",
      "program": "${workspaceFolder}/hello",
      "args": ["Alice"],
      "cwd": "${workspaceFolder}",
      "MIMode": "gdb",
      "miDebuggerPath": "/usr/bin/gdb",
      "setupCommands": [
        { "description": "Enable pretty-printing for gdb", "text": "-enable-pretty-printing", "ignoreFailures": true }
      ]
    }
  ]
}
Debug Steps
- Open
main.cpp - Click left of a line number to set a breakpoint
- Press Run..Start Debugging
If VS Code still shows the “Select debugger” list after the C/C++ extension is installed, choose “C++ (GDB/LLDB)”. If you are editing/launching from the Windows side (not via Remote - WSL) and want to debug a Windows build, you would instead install the Windows C++ debugger support (“C++ extension for Visual Studio”) and pick the appropriate Windows debugger.
Notes for WSL users:
- Open the project from the WSL Ubuntu terminal using
code .(this runs the Windows VS Code connected to your WSL environment). The Remote - WSL extension makes the C/C++ tooling operate inside WSL so the debugger and paths refer to the Linux side (e.g./usr/bin/gdband/home/<you>/...). - When you create the configuration, choose the GDB option (“C++ (GDB/LLDB)”) and use the sample below. The important fields to check are
program(path to the built executable inside the WSL workspace) andmiDebuggerPath/MIMode(pointing to/usr/bin/gdb).
Troubleshooting checklist:
- Make sure you built the executable in WSL (run
cmake . && makeinside WSL) so the executablehelloexists. - Confirm
gdbis installed in WSL:which gdbandgdb --version. - If the debug session fails to start, open the Debug Console for errors — common causes are incorrect
programpath or missingmiDebuggerPath.
8. Summary and Reminders
- This environment should match our autograder’s exactly
You now have a Linux-grade C++ toolchain on Windows using WSL.