EE109 – Spring 2023: Introduction to Embedded Systems
Project Box – Fall 2022
All students in EE109 are provided with project box that contains all of the tools and components required for the doing the lab assignments throughout the semester. Additional parts will be provided for the project during the last few weeks. You should have the project box with you when you attend the lab sessions in VHE 205 so you will be able to work on the lab assignment. Many of the components that are described below are used in more than one lab assignment. Please make every effort to not lose any of tools or components. If something is missing or broken, see the lab teaching staff to acquire a replacement. All the tools and components are returned to the Electrical and Computer Engineering Department at the end of the semester.
The rest of this web page discusses all the parts included in this semester's project box. When you receive your box, please use this page to check that all of the items are in the box. If anything is missing contact your instructor as soon as possible.
We have included links below to the vendors from whom we purchase the project box parts. If you wish to purchase your own parts you can use these links or find other vendors supplying similar items. If you have questions about whether some other vendor's components are compatible with the ones we provide please contact us.
Tools
The project box contains a wire stripper and a small screwdriver. The wire stripper will be used to cut and strip pieces of wire for building circuits on the breadboard. The screwdriver is used to make adjustments to some of the components provided, and can also be use to remove integrated circuits from the breadboard without damaging them.
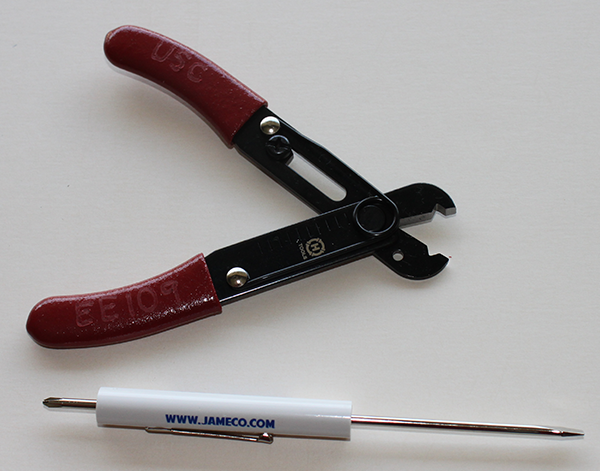
Vendor Links: Wire stripper, Screwdriver
Breadboard
The solderless breadboard in your project kit allows you to quickly build and modify a circuit by inserting the components and wires into the holes of the breadboard. Details on how to wire circuits on the breadboard will be discussed in Lab 1.
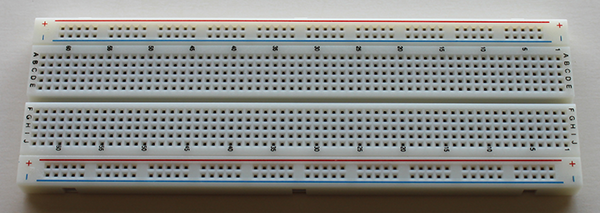
Vendor Link: Breadboard
USB Cable
The microcontroller board uses a USB cable to connect to your laptop. In the tool box is a standard USB cable that has the proper connector on one end to plug into the microcontroller board, and the traditional "USB Type-A" connector on the other end. If your laptop has the USB Type-A connector on it this cable should work fine. However many newer laptops (mainly Apple MacBooks) only have the newer USB-C connectors. If your computer only has the USB-C ports you will have to purchase a USB-C to USB-A adapter for use throughout the semester. USB-C to USB-A adapters can be purchased at most electronics stores or online. The ones we have used in the classroom were purchased from here but any similar one such as this one should work just as well.

Based on past experience we recommend that you do not purchase a USB-C to USB-A hub that has multiple USB-A outlets. For some reason these have often not worked correctly. We recommend just buying a simple adapter with one USB-A port like the one pictured above.
Vendor Link: USB cable
Arduino Uno
The Arduino Uno microcontroller board will be used as the heart of all the lab assignments. It is programmed from your laptop and we will be making connection from the Arduino to the breadboard to build the circuits. If your Arduino came in a box, you don't have to save the box, it can be discarded. Some Arduinos also come with a clear plastic panel attached to the bottom of the board. You can either keep the Arduino attached to it or remove the panel and discard it.
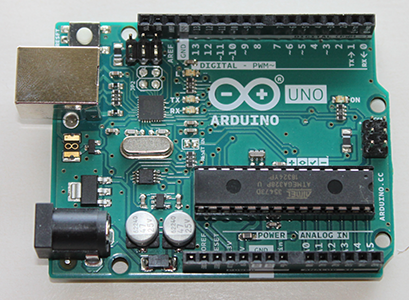
Vendor link: Arduino Uno
LCD Shield
The LCD shield can display 2 lines of 16 characters and will be used to output information from your program. The shield will be attached to the Arduino starting with Lab 4.
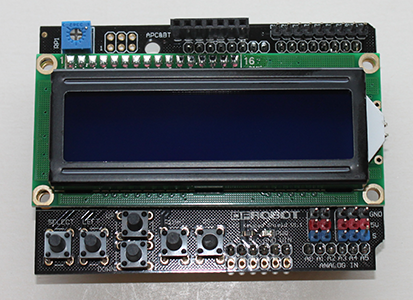
Along the lower edge of the LCD shield are five black buttons that stick up. Test these buttons by pressing them. If they make distinct "click" when pressed they are working correctly. If instead the black part wobbles around and it feels like it's about to fall off then the button may be defective. In this case notify your instructor to see about getting a replacement.
Vendor link: LCD shield
Jumper Wires
Inside the project box is a small plastic bag containing 15 male-female jumpers. One end of the jumper has a metal pin that can be inserted into the breadboard holes. The other end has a black connector that can be pressed down over some of the pins that stick up on the LCD shield. These will be used to make connections between the Arduino and the breadboard.
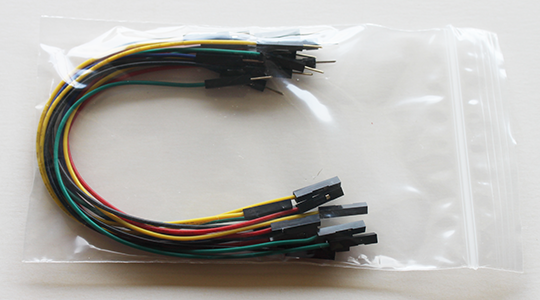
Vendor link: Wire jumpers
Electronic Components
In the project box is a small plastic bag containing several electronic components that will be used in the labs this semester. Some are used in several labs so be careful to not break or lose them. The following describes each of the components.
Resistors
The bag contains two each of three different values of resistors. The values can be determined by the color bands on the resistors, and you will learn how to read these values in Lab 1. The colors on the resistors in the picture below may not match the ones in the bag. Most of these resistors will be needed for Lab 1, but some will also be used in later labs.
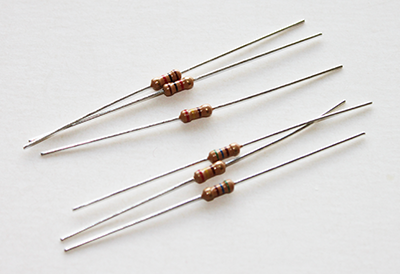
Vendor links: Resistor 1, Resistor 2, Resistor 3
Pushbuttons
The kit contains four small pushbuttons which will be used in several of the labs as inputs to the program running on the Arduino. They may all be different colors but if not that won't be a problem. How the buttons are used in a circuit will be discussed in one of the lectures, and the details of wiring them into a circuit is discussed in one of the lab writeups.

Vendor link: Pushbuttons
LEDs
There are three light-emitting diodes (LEDs) of different colors in the bag. These will be used as simple outputs from the Arduino in several of the labs. Details on how to wire them up and make them work with the Arduino program will be covered in one of the lectures.
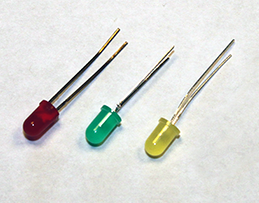
Vendor links: Green LED, red LED, yellow LED
Integrated Circuits
There are three small black integrated circuits (ICs) in the bag. In some cases it may be difficult to read the part numbers on the top of them but you should have a 74HCT00, 74HCT04 and 74HCT125. Check to make sure that none of the metal pins are broken off. If some are bent slightly, they can carefully be bent back to being straight.
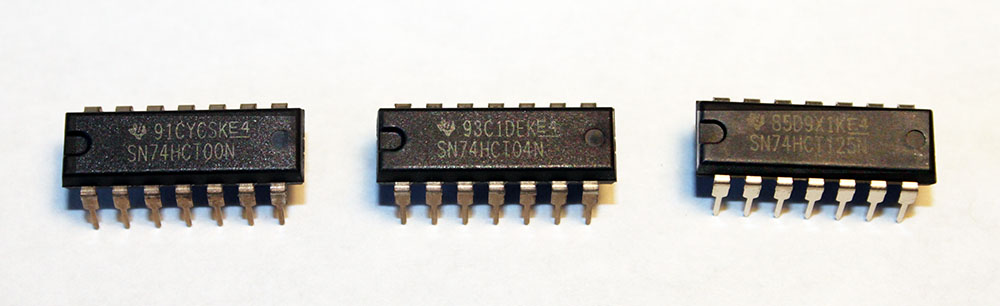
Vendor links: 74HCT00, 74HCT04, 74HCT125
Rotary Encoder
The rotary encoder is used to provide a dial-type input to your microcontroller program and is used in multiple labs. Check to make sure all three pins on the bottom are intact. If any are bent try straightening them, but take care since they tend to snap off easily.
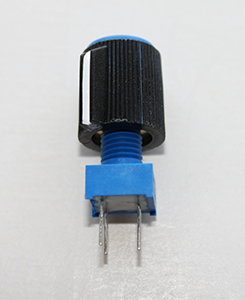
Vendor links: Rotary encoder, Knob
Potentiometer
The small blue potentiometer is a resistor that can have its resistance value varied by turning the yellow control on the top with your screwdriver. As with the encoder, check to make sure all three pins on bottom are intact.
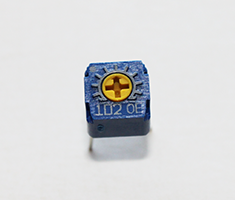
Vendor link: Potentiometer
Buzzer
The black cylinder-shaped component is a small buzzer that we will be using as very simple speaker to generate tones and other sounds. Important: Your buzzer may have a piece of yellow plastic stuck over the top of it that was put there to protect the insides during manufacturing. This piece of plastic has to be removed or the buzzer won't make any sound. Just peel if off and throw the plastic away.
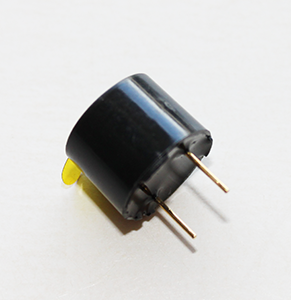
Vendor link: Buzzer
Additional Components
The following items are provided during the Fall 2022 for labs and the end-of-semester project.
Servo Motor
The servo motor comes with a bag of plastic arms that can be pressed down over the motor armature. Installing one of the arms makes it easier to see if the motor has rotated.
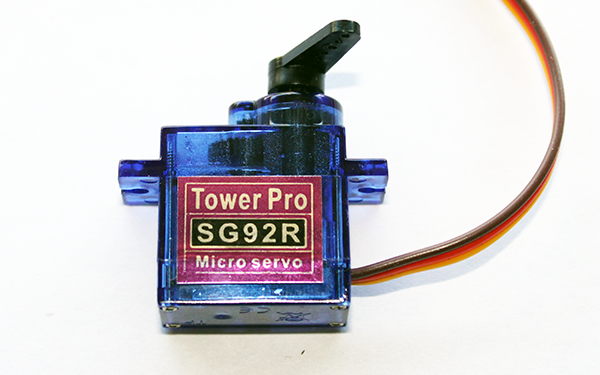
Vendor link: Servo motor
White LED
Vendor link: White LED
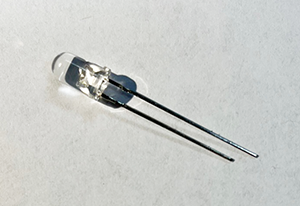
Phototransistor
The phototransistor looks like the white LED but is substantially smaller.
![]()
The phototransistor provided for the project, part nunber SDP8405-003, is no longer manufactured. For estimating the production cost of the speed trap, you can use a price of $1.20 each since this is what we paid for them a few years ago.